Page 2 of 16
Re: And Now for the Twin
Posted: Fri May 23, 2014 8:19 pm
by Mike Rometer
I spent a large amount of time cutting back the ports and then gas-flowing them, very reminiscent of days-gone-by trying to get too much go, out of too small, two-strokes. I won a blister from the filing.

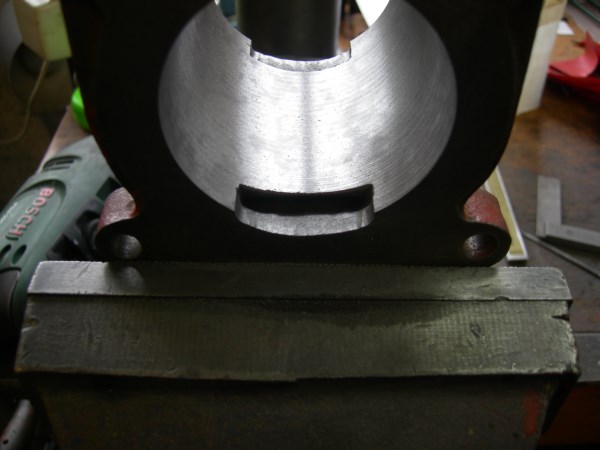
- Old Port (600 x 450).jpg (40.56 KiB) Viewed 30888 times
Once the liner has been cut back that too will need a little 'treatment' on the inside edge. At least the ports seem to be plenty big enough through to the steam chest face.
I got the liners finished, and fitted, with a drop of loc-tite round the port area just in case there should be any thoughts of leakage.
- Liners (7) (600 x 450).jpg (80.86 KiB) Viewed 30888 times
The tops have now been cleaned off.
Mike, your thoughts on pistons largely mirror my own. I have also thought about using Aluminium, rather than cast, just to keep the weight down further.
Re: And Now for the Twin
Posted: Sat May 24, 2014 2:07 pm
by DetroiTug
Mike,
Nice work. Within a half-thou, yep thats well within Steam engine tolerance. When I bought my twin which was started and never completed, the cylinders had been bored, so I got out the Mitutoyo bore gages and started measuring, found they were bored well but .010" over. One of my now steam buddies walked in and sensed my concern, he laughed and said "It will be fine". And it has been. I machined the Alu pistons .004" under and used 3.000 rings. She will run down to 5 psi.
If you've never ran twin before, you'll love it. It will use a bit more steam and fuel, but the ease of operation is very enjoyable.
-Ron
Re: And Now for the Twin
Posted: Mon May 26, 2014 2:44 pm
by Mike Rometer
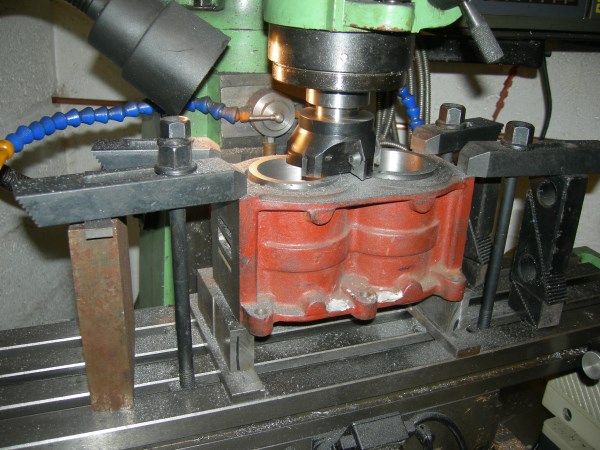
Having cleaned the liners down to face level top and bottom. The existing ports are a little bigger than 1/8", but not 3/16" wide, so I milled them ports down 1/4", to allow the cylinder covers about a 1/16" register into the bore. I then fly-cut the bottom to get rid of the slight warp (about 0.005"). At that point I decided that I might as well fly-cut all the faces to make sure everything was true. In the end it seems it was, as all I took off the top and valve faces was 0.002"
- Fly cut valves (1) (600 x 450).jpg (55.62 KiB) Viewed 30844 times

- Flycut All Faces (1) (600 x 450).jpg (75.8 KiB) Viewed 30844 times
I am now left with a few thou less than 3.5" between the port edges, so should have no difficulty with the 3" stroke that I first envisaged. The final bores are both around a thou under 2.5", but I haven't honed them yet as I haven't decided if it's really necessary. Rings I already have in stock.
By my calculations (never that reliable), I reckon about 5.5hp @ 400rpm on 125PSI. Should push something like a Frolic 18 without too much strain?
Ron, 0.010" oversize is a usual amount on I.C. engines, sometimes they even come that way from the factory. In fact I've seen them with only one bore oversize on a multi, from the factory!!!! Anything rather than throw out the casting I suppose. Rings and pistons come in std. oversize increments of 0.010, up to 0.060". As long as the piston fits the bore . . . . .


Re: And Now for the Twin
Posted: Sat May 31, 2014 3:59 pm
by Mike Rometer
Cricky, who invented computers? What a fight to get a couple of photos reduced to posting size.

Seems I had some hang up with file handling conflicts which has taken the thick end of an hour for me to sort out!

Oh to be an expert in these things!
After the valve faces etc. I cleaned off and drilled the exhaust outlets and faced the drain-cock bosses.
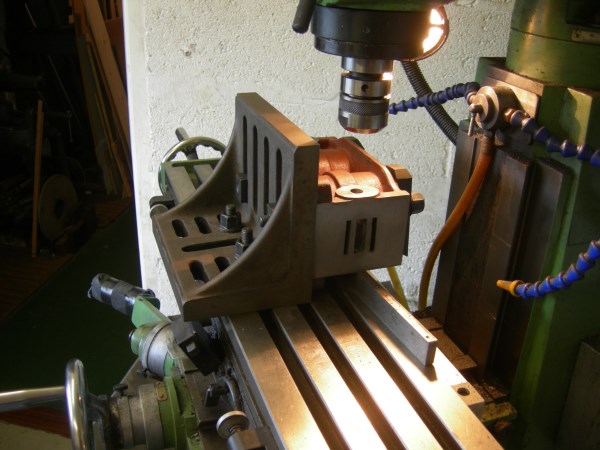
- Exhaust (3) (600 x 450).jpg (63.5 KiB) Viewed 30817 times
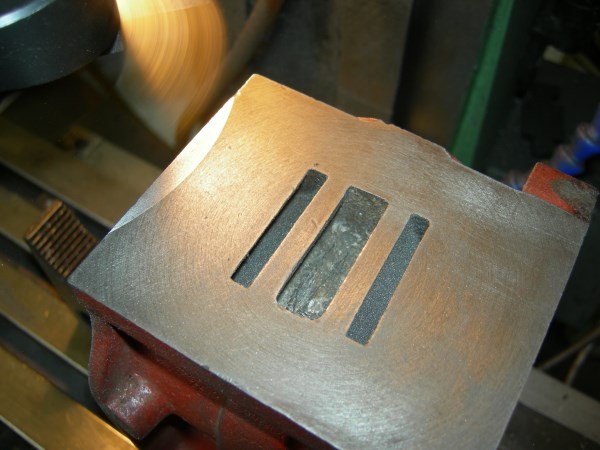
Then I attempted the port plates which proved slightly troublesome with a long-series cutter that decided it knew better than me, where it should cut. Once I went back to the standard length it worked out fine.
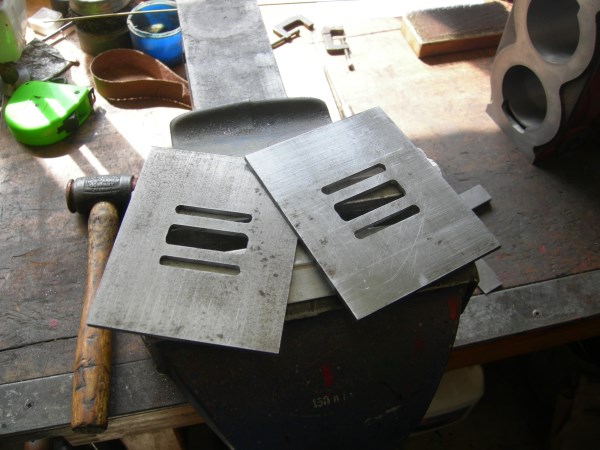
- Port Plates (600 x 450).jpg (61.03 KiB) Viewed 30817 times
The ports on this seem to me to be more than adequate, even generous, at 1.5" by 0.200" (steam) and 0.450" (exhaust), but I suppose that the important bit is that they are big enough, and in no way restricting, the slide-valve will be doing the actual work.
Re: And Now for the Twin
Posted: Sat May 31, 2014 4:52 pm
by marinesteam
Mike,
Looking good.
What kind of toolholder do you have chucked up in that first picture?
I might of missed something, but whats the reasoning behind the port plates?
Ken
Re: And Now for the Twin
Posted: Sat May 31, 2014 5:02 pm
by Mike Rometer
Ken, the tool holder is just a collet chuck, without the cutter (I nearly forgot to take the photo).
If you look back to the first post you'll see the problem with the ports in one of the photos (3rd), I reckoned that there was too much miss-alignment to correct without making the steam port too wide, or the bridge too narrow (or both). Granted it would have been nicer to have a gun-metal v-slide running on cast, rather than mild steel, but what the heck, summat had to give.
Re: And Now for the Twin
Posted: Sun Jun 01, 2014 3:17 am
by marinesteam
I didn't read back that far

Could have angled the valve to match
Ken
Re: And Now for the Twin
Posted: Sun Jun 01, 2014 7:37 am
by Mike Rometer
Hmmm!
Never thought of that!
Re: And Now for the Twin
Posted: Wed Jun 11, 2014 10:44 am
by Mike Rometer
There has been a short delay in proceedings, due to other 'domestic' duties.
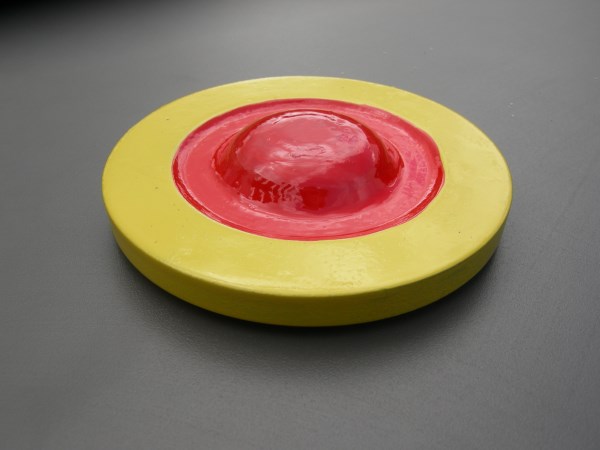
- DSCN5581 (600 x 450).jpg (33.17 KiB) Viewed 30760 times
A single pattern for the two cylinder top covers. They will need a flat where they meet, but it was easier to produce the pattern without it. I will need to produce some of the other patterns before contacting a foundry.
Re: And Now for the Twin
Posted: Wed Jun 11, 2014 11:37 am
by DetroiTug
The sides look parallel or maybe it's just the picture. It may be a non-issue depending on the foundry, but all patterns should have tapered sides so they can get them out of the sand.
The best thing to do is contact the foundry first and ask them how they want them. I just went through that with one where my ideas and their procedure didn't coincide.
It cost me about 4 weeks of waiting for parts I couldn't use.
-Ron