Stuart Turner 6A - Crankshaft Casting

A special section just for steam engines and boilers, as without these you may as well fit a sail.
User avatar
DetroiTug
Full Steam Ahead
Full Steam Ahead
Posts: 1863
Joined: Fri Nov 27, 2009 5:56 pm
Boat Name: Iron Chief
Location: Northwest Detroit

Re: Stuart Turner 6A - Crankshaft Casting

Post by DetroiTug » Mon Dec 19, 2011 9:04 pm

On the twin in the tug, the center section disc and shaft are just slip fit and keyed, secured with a set screw and back up set screw to secure. This has very worked very well so far and should be easy to disassemble later. The other discs are both pressed in, no trouble with that either. Some very large loads have been exerted on the crank and no issues. The crankpin on No 1 is a pin pressed in to one side with a shoulder and nut to secure. On No 2 it is just a pin pressed in to the disc and a hex nut.

Image

Image

Image

(These pictures remind me of a point in my project, when I had a loooong way to go)

-Ron
SteamGuy
Steam on Deck
Steam on Deck
Posts: 50
Joined: Wed Nov 03, 2010 4:50 am
Boat Name: To be determined
Location: Central USA
Contact:

Re: Stuart Turner 6A - Crankshaft Casting

Post by SteamGuy » Mon Mar 19, 2012 2:23 am

I have been inspired by the twin compound being modeled by Ranier and some other engines such as the Stuart 6A, and so am considering designing and perhaps building a slightly larger twin compound than the 6A.

I have noticed that the 6A does look like a scaled up model engine, and while it is a very handsome engine and seems to run great, my thoughts are to make a more rugged and slightly larger version.

I was reviewing the practicality of attempting the build of a twin with bores at 3" and 5", and a stroke of 3.75", and whether I could cast all of the components, and I think I could handle the castings, at least in a bronze alloy at this point (hopefully cast iron at some point), but when I thought about the crank, the only good design I could think of, other than to try casting a crank in malleable iron, was to weld a crank together.

Has anyone tried a fabricated crankshaft design, using welding?
I can heat the entire crank after welding for stress relief if necessary, but am not sure what temperature to use. For welding rods, maybe a low hydrogen rod?

My plan would be to make a deep "v" groove either side of each joint, and make multiple welding passes, cleaning between each pass. The entire crank would be made slightly oversized to allow for final machining. The "v" would be perhaps 45% of the depth of the journal either side.
I guess alternately, I could put the "v" on one side only, and then make one final hot pass on the non-v side to melt through the non-v part.

I have found that a properly welded connection is sometimes the only thing strong enough to carry a given load, and I have had some silver soldered joints fail when I thought they would not. Steel also seems to be somewhat flexible and malleable, and so should be resistant to the torque problems which may crack non-steel crank, but I guess the crank would have to be strong enough so that it did not get into any torsional bending trouble.

I saw one configuration recently where a large shafte (12" dia) was placed in the lathe and turned very slowly as a wire-feed MIG welder deposited metal continuously, and the lathe carriage moved the welding head across the shaft. The gas shielding eliminated any cleanup. Worked very well, but I have a stick welder.

Anyone have any thoughts on either the welded arrangement or using a malleable iron cast crank?
Pat J
User avatar
Lopez Mike
Full Steam Ahead
Full Steam Ahead
Posts: 1903
Joined: Wed Dec 07, 2011 6:41 am
Boat Name: S.L. Spiffy
Location: Lopez Island, Washington State, USA

Re: Stuart Turner 6A - Crankshaft Casting

Post by Lopez Mike » Mon Mar 19, 2012 3:44 am

So Pat, wouldn't Ron's design in the previous pictures work for you? Much easier than a bunch of welding that would introduce all sorts of distortion that would have to be machined or ground out.

I had my boat engine crank welded up on a specialized TIG welding machine like you describe and even then the journals had to be ground a bit undersized to get it all true.
If you think you are too small to make a difference, try sleeping with a mosquito.
Dalai Lama
SteamGuy
Steam on Deck
Steam on Deck
Posts: 50
Joined: Wed Nov 03, 2010 4:50 am
Boat Name: To be determined
Location: Central USA
Contact:

Re: Stuart Turner 6A - Crankshaft Casting

Post by SteamGuy » Mon Mar 19, 2012 4:09 am

Mike-

I guess I have some preconceived ideas about what I would be comfortable with operating.

As far as steam engine design, I like to think I go by the "old school" methods, ie: not use of loctite materials, no modern fasteners, etc.

I did notice that many motorcycle engines have interference fit crankshafts, but then they have multi-million dollar facilities, metalurgists, machines, precision quality control, etc, and can make it happen correctly.

I can weld very well, so that was my thought, and I would want a "hardened" engine design which I would hope would be more like industrial grade, with large bearing surfaces, and a very long life. Never mind that most launches may not want or need an industrial grade engine. I do industrial grade electrical design work, and so have an industrial-grade mindset for everything.

My dad always used rolled-in copper tubes in his boiler, but I would proabably only uses a welded steel tube design, just because I am more comfortable with that.

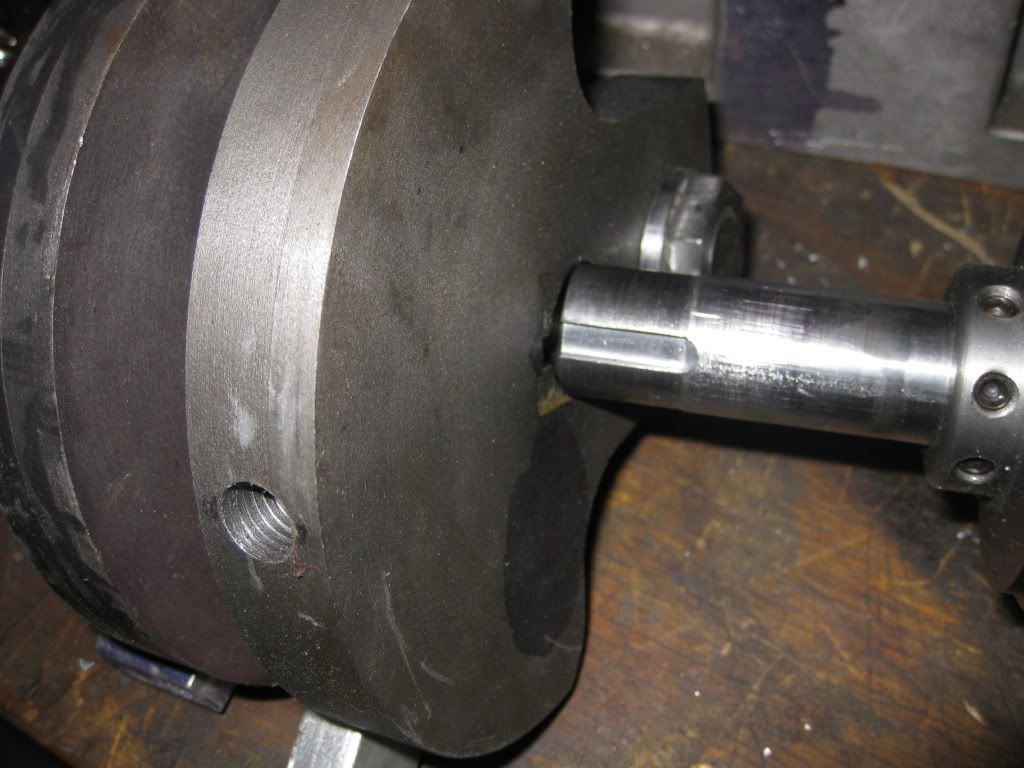
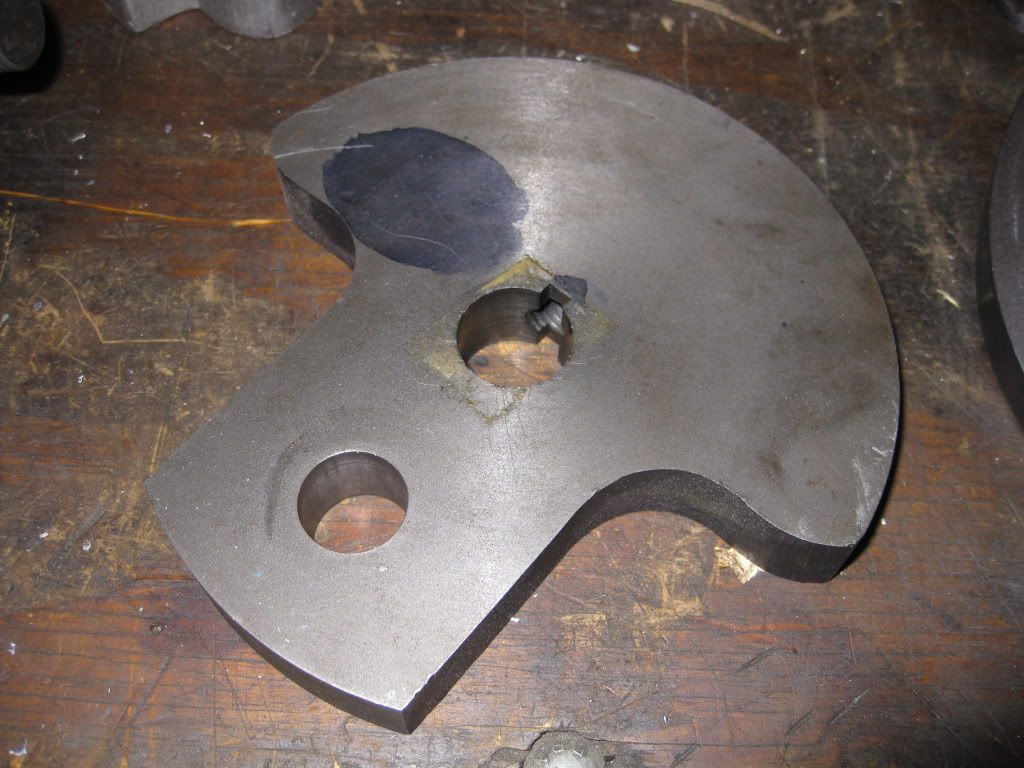
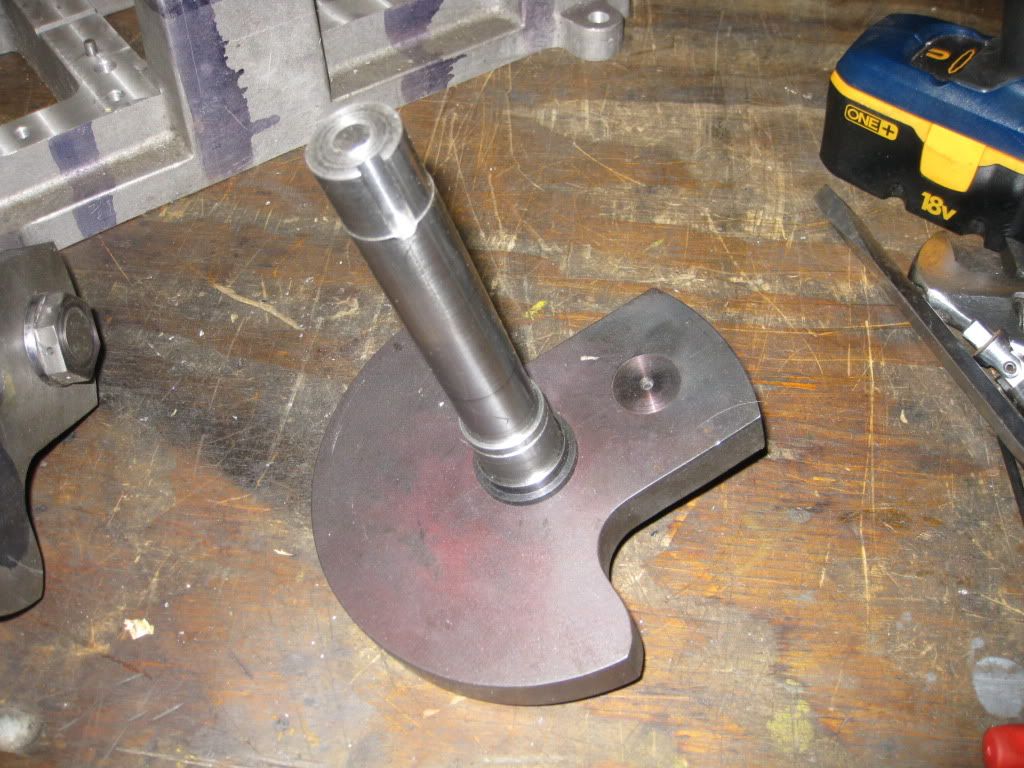
It would be more trouble to weld a crank up, and then machine it straight, but I think that would be a method for me that would be the most "sure thing" arrangement, and should be a very strong crankshaft with proper stress relief. Of course, they did not weld crankshafts in the old days, but from a final visual standpoint, there would be no way to tell if a crank had been welded.

I am just not one to use press fit parts in a high stress situation, and I think about situations where perhaps the throttle is opened too fast, or as others mentioned, the prop gets locked up, or even an inadvertent reversing of the engine. I have also press fit parts, and been off a little, and cracked the part. Same with a heat shrink, you have to pay very close attention, and I would take my chances with welding first.

I guess we all have our own design ideas/methods.
Pat J
User avatar
Lopez Mike
Full Steam Ahead
Full Steam Ahead
Posts: 1903
Joined: Wed Dec 07, 2011 6:41 am
Boat Name: S.L. Spiffy
Location: Lopez Island, Washington State, USA

Re: Stuart Turner 6A - Crankshaft Casting

Post by Lopez Mike » Mon Mar 19, 2012 4:31 am

Of course you need to do what you are comfortable with. That's important.

That said, I have built crankshafts for racing motorcycle engines from scratch with just ordinary press fits and trued them with a dead blow hammer and never had them move even slightly. The bearings have failed so violently that the rear wheel locked and deposited me on my rump at a fair rate of knots but the crank was still true when I opened up the engine.

Another way to deal with it is to build a press together crank and then do a locking weld on the side of the main shafts and the crank pins away from the bearings. The one engine I developed from a motorcycle engine for hydroplane racing that wasn't strong enough with just a press fit, was fixed this way. I pressed it together, trued it with a dead blow hammer and a dial indicator and then had a friend with a TIG welder run a small bead to make sure the pins and shafts didn't twist at all in the crank disks. Mind you this was a 1200 cc supercharged engine producing over 250 h.p.!!

Another nice thing about a built up crank is that you can try modern things like ball bearings on the mains and pre-manufactured crank pins with hardened and ground surfaces. Nice to have an engine that just runs and runs. My main bearings were lubed when they were built and that is the end of that.
If you think you are too small to make a difference, try sleeping with a mosquito.
Dalai Lama
User avatar
barts
Full Steam Ahead
Full Steam Ahead
Posts: 1070
Joined: Wed Nov 18, 2009 6:08 am
Boat Name: Otter, Rainbow
Location: Lopez Island, WA and sometimes Menlo Park, CA
Contact:

Re: Stuart Turner 6A - Crankshaft Casting

Post by barts » Mon Mar 19, 2012 4:41 am

The pinch bolt type method of building cranks have worked very well for Rolly Evans...

As he says:

"The two webs are tack welded together before drilling then they are lapped to a tight twist fit of the shaft. Next the plates are numbered for left and right and separated. Next a cross bolthole is drilled between the two holes and one side threaded for a fine thread, and a key way is broached in the hole for the main shaft. A slot is cut between the two holes and a grade 8 fine thread cap screw is used to pinch the two half’s together after alignment. I have used this procedure on several engines and have never had a problem.

A photo is on my web site. This engine ran for twelve years in my big boat at fifteen horse power at 460 RPM. 275 PSI 100 D of superheat, 26 inch Vac. It still is in very good condition."


- Bart
-------
Bart Smaalders http://smaalders.net/barts Lopez Island, WA
Post Reply